Do you want to learn How to Add Affiliate Links to Your Blog Post?
Previously, I taught you How to Use ShareASale Affiliate Program. This post showed you how to sign-up for ShareASale, how to apply for affiliate programs, and how to find links and banners.
There have been questions on what’s next after you have been approved with ShareASale’s Affiliate Programs.
Follow along as I teach you:
- Where to find your affiliate links in ShareASale
- How and where to place affiliate links
- Where to find out when someone has clicked or purchased through your links
This post contains affiliate links which means I may receive a small commission at no additional cost to you. To learn more about affiliate links, click here.
Where to find your affiliate links in ShareASale
If you are looking for the link for all your approved Merchants, hover over Merchants then select Merchant Status.
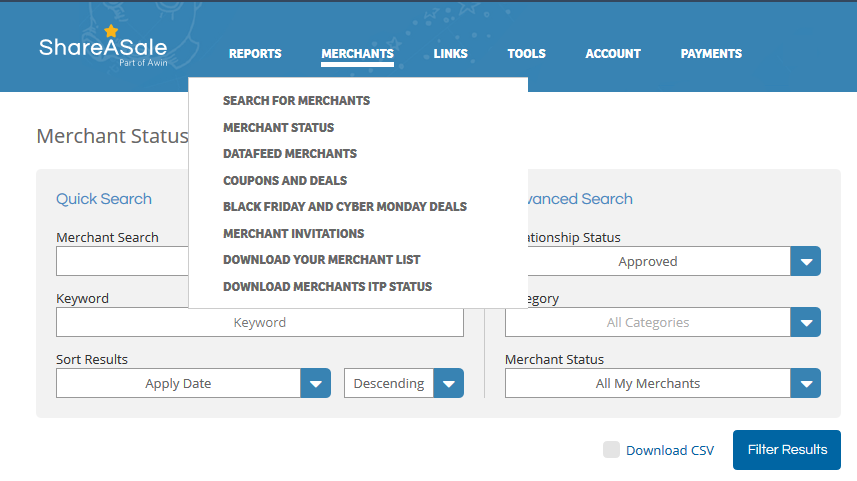
This will take you to the list of Merchants you are an affiliate of with your referral URL, commission and more information.

You can copy the referral URL and take it over to your website where you would like to use that affiliate link.
Related: How to use ShareASale Affiliate Program
How and where do you place the affiliate links
Now that you have found your link on ShareASale or any affiliate program, you want to learn how to place this affiliate link onto your website.
Affiliate Links within a Blog Post
Head to the blog post you want to place your affiliate link on.
- Copy the URL link from ShareASale or your affiliate program.
- Highlight the text you would like to link within your blog post
- Click the Insert/Edit Link Button (Control + K)
- Paste your URL into this field, click the blue arrow to apply.
Affiliate Links within a Widget
In your WordPress website, hover over Appearance and click on Widgets.
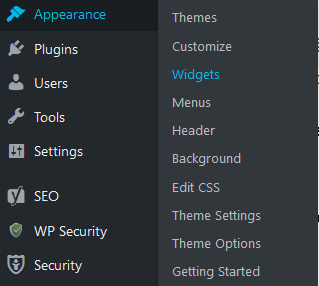
On the right-hand side, you should see widget options. This will vary based on your WordPress Theme.

Click on the widget you want to add your banner to. For me, most of my widgets are in the Right Widget.
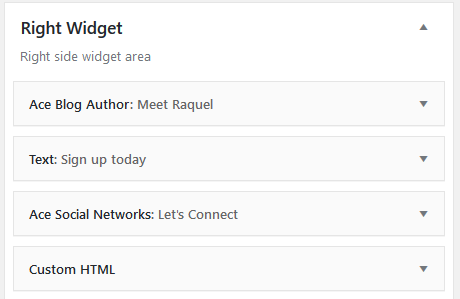
On the left-hand side, you will see a list of available widgets. Find the Custom HTML widget.
You can drag it over to your Right Widget or click it and choose the widget you would like it to go to.
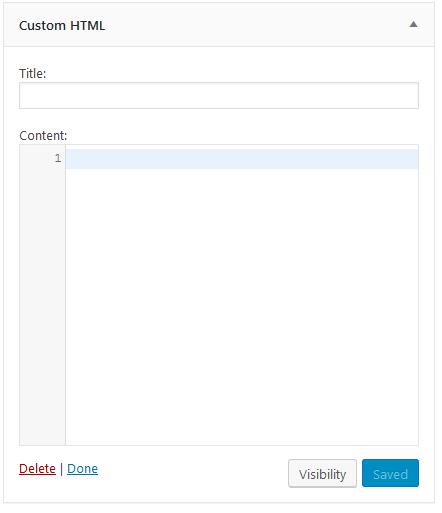
You can add a Title if you like. This will show as the text above your banner.
Paste your URL into the Content Section
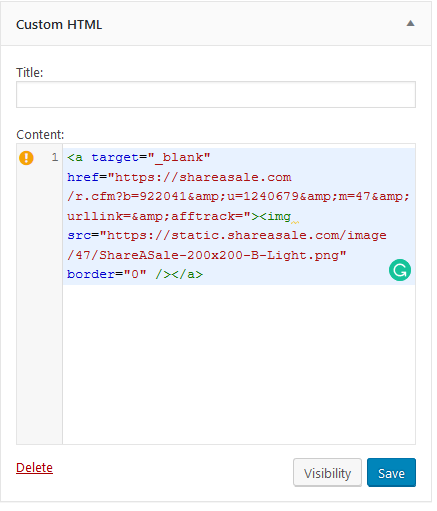
There is a little yellow exclamation point showing that I need to add an alt attribute to the image.
To do this, find the point after the text .png” and enter a space and type alt=”Your Banner Name”
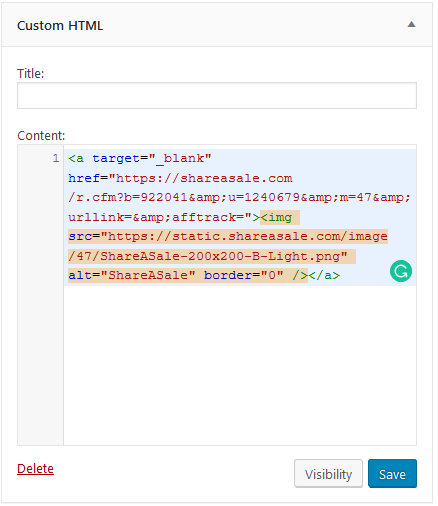
Once you have added your alt attribute, click Save and this will apply to your website.
If you refresh your website, the widget will now show where you placed it. If you click on the banner, your affiliate link should work correctly.
Related: How to Improve Your Blog Post
How will I know when someone has clicked or purchased through my links?
The great thing about ShareASale is that they will email you a notification if someone purchases through your affiliate link.
Trust me, you will get so excited, even if it’s just $1.00!
If you are like me and want to look into a bit more detail of purchases, you can go into ShareASale and click on their Reports, then Activity Details.

There are a variety of reports you can choose from to see traffic to your blog post, unique hits, clicks, sales and more.
If you haven’t signed up to become an affiliate of ShareASale, click here to start making money today!
I hope this post helped you learn to add affiliate links to your website. If you have any questions, post them below and I would be happy to help or head back to my Blogging Resources for more tips and tricks for your blog.
